

This Christmas dessert recipe is a delightful collaboration with Frankie’s Studio, a charming ceramics gallery and lifestyle store nestled in the heart of Suffolk and known for their beautifully crafted ceramics and carefully curated home goods. For this honey panna cotta, I’ve used some of their beautiful ceramics and paired the dessert with a luxurious morello cherry compote from their carefully selected food range. Their delicious local wildflower honey also features in this recipe.
When you’re looking for a show-stopping Christmas dessert that won’t keep you chained to the kitchen on the big day, this honey panna cotta with morello cherry compote is your answer. The silky, honey-sweetened cream paired with jewel-toned cherries creates a dessert that’s as beautiful as it is delicious—and the best part is that you can make it entirely ahead of time. It’s the kind of elegant, make-ahead dessert that lets you actually enjoy your holiday gathering while still impressing everyone at the table.
Recipe:
Prep Time: 15 minutes
Chill Time: 4-6 hours (or overnight)
Serves: 5-6
Ingredients:
For the Honey Panna Cotta:
- 360ml double cream
- 180ml whole milk
- 80ml honey (wildflower honey works beautifully)
- 7g unflavoured gelatine powder
- 1 teaspoon pure vanilla extract
- Pinch of salt
For Serving:
- Morello cherry compote
- Fresh mint leaves for garnish
Method:
- Bloom the gelatine. Pour the whole milk into a medium bowl and sprinkle the gelatine evenly over the surface. Let it sit undisturbed for about 5 minutes—you’ll notice the gelatine absorbing the liquid and becoming soft and spongy. This step, called “blooming,” ensures your gelatine dissolves smoothly without any lumps.
- Heat the cream and honey. While the gelatine is blooming, combine the double cream, honey, and a pinch of salt in a medium saucepan. Place it over medium heat, stirring occasionally with a whisk or wooden spoon to help the honey dissolve into the cream. Heat the mixture until it’s steaming and just beginning to show tiny bubbles around the edges—you want it hot but not boiling. This should take about 4-5 minutes.
- Combine everything together. Remove the cream mixture from the heat and add the vanilla extract, giving it a quick stir. Now, pour the hot cream mixture over the bloomed gelatine and milk, whisking gently but thoroughly until the gelatine has completely dissolved. You shouldn’t see any granules or streaks—everything should look smooth and unified. This is important for achieving that signature silky panna cotta texture.
- Strain for perfection. Set a fine-mesh strainer over a large measuring jug or bowl with a pouring spout (this makes the next step easier). Pour the panna cotta mixture through the strainer to catch any undissolved gelatine bits, foam, or the thin skin that sometimes forms on heated cream. This extra step takes just a moment but ensures your finished dessert is absolutely smooth and luxurious.
- Pour into moulds. Lightly oil five to six 120ml ramekins or panna cotta moulds with a neutral oil (like vegetable or grapeseed oil), using just the tiniest amount—you can wipe it around with a paper towel so there’s barely a sheen. This will help with unmoulding later. Carefully pour the strained panna cotta mixture into the prepared moulds, dividing it evenly among them. If you notice any bubbles on the surface, you can gently pop them with the tip of a knife or skim them off with a spoon.
- Chill until set. Transfer the ramekins to the refrigerator. Let them chill for at least 4-6 hours, though overnight is even better. The panna cotta needs this time to fully set—you’ll know it’s ready when it jiggles slightly when you gently shake a ramekin but holds its shape and doesn’t slosh around like liquid.
- Unmould with confidence. When you’re ready to serve, run a thin knife around the edge of each panna cotta, pressing it against the side of the ramekin to avoid cutting into the dessert itself. Go all the way around to break the seal. Next, dip the bottom of each ramekin in a bowl of warm (not hot) water for about 5-10 seconds—this gently loosens the panna cotta from the bottom. Place your serving plate upside down over the top of the ramekin, then quickly but carefully flip everything over together. Give the ramekin a gentle shake if needed, and the panna cotta should slide out onto the plate with a satisfying little wobble. If it’s being stubborn, dip it in the warm water for just a few seconds more.
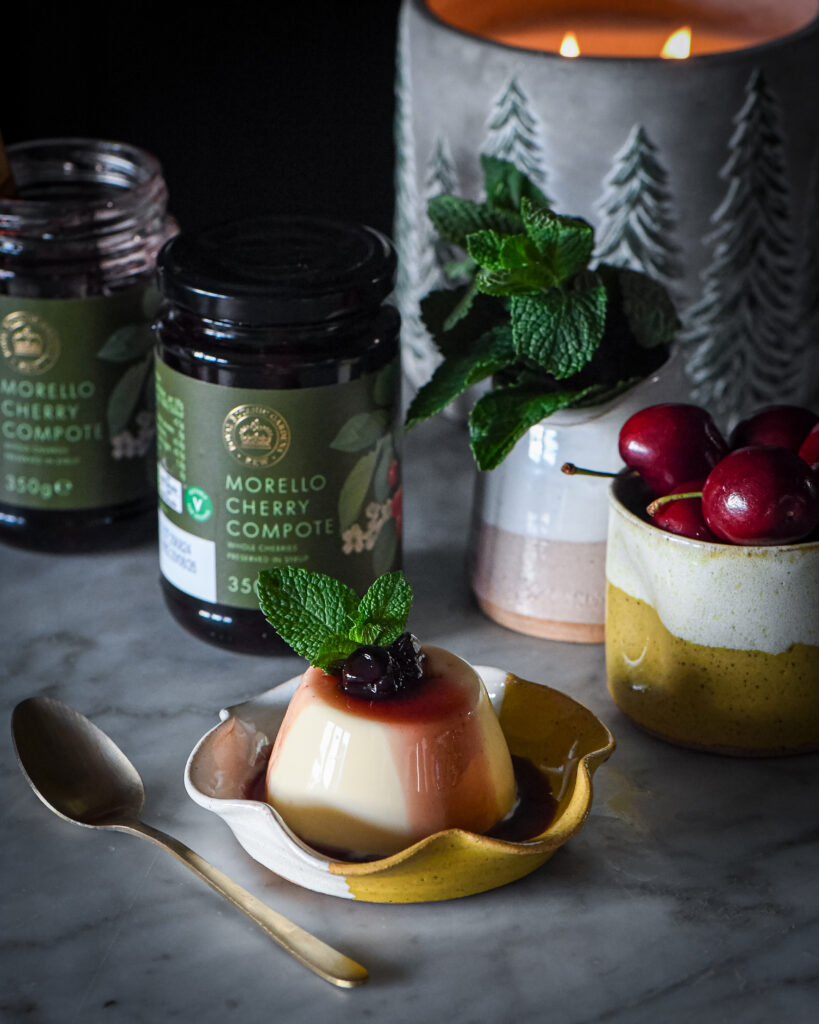
- Add the cherry compote. Spoon a teaspoon of the jarred morello cherry compote over the top of each panna cotta, letting some of the deep red syrup pool around the base. The tart-sweet cherries are the perfect complement to the delicate honey sweetness of the cream, and the colour contrast is absolutely stunning—very festive for Christmas!
- Garnish and serve. Tuck a small sprig of fresh mint leaves next to each panna cotta or place a few leaves artfully on top of the cherry compote. The bright green against the white cream and ruby-red cherries creates a beautiful holiday colour palette.
Serving Tips:
This dessert is best served chilled, so keep the plated panna cottas in the refrigerator until you’re ready to bring them to the table. If you prefer, you can also serve the panna cotta directly in the ramekins without unmoulding—simply top with the cherry compote and mint, and provide small spoons. This is actually a lovely, rustic presentation that’s even easier and eliminates any unmoulding anxiety. Either way, the combination of creamy, honey-scented panna cotta with those gorgeous morello cherries is absolutely divine.
Make-Ahead Note:
One of the best things about panna cotta is how you can prepare this in advance. You can make these up to two days ahead—just keep them covered in the refrigerator in their moulds until you’re ready to unmould and serve. Wait to add the cherry compote and mint garnish until just before serving to keep everything looking fresh and beautiful. This makes it an ideal dessert for Christmas dinner when you have a million other things to coordinate. Simply unmould, top, and present—your guests will think you spent hours on these elegant little beauties!

Previous Post
Next Post
Follow us on instagram at @violetkitchenstudios.
A creative space for photoshoots, workshops & events

+ Show / Hide Comments
Share to: